Monday 30 April 2007

Queen for a day


Queen for a day
Originally uploaded by DigitalHeMan.
Today (30th April) was Queen's Day. This is when the Dutch spend the day outside celebrating the (former) queen's birthday. This year we were blessed with good weather, so around 500000 people gathered in Amsterdam.

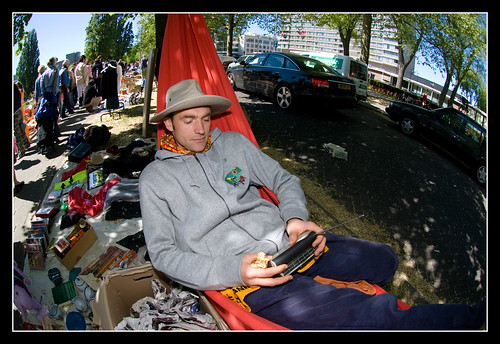
The day traditionally starts with the vrijmarkt, which is where anyone can set up a stand and sell whatever they feel like getting rid of. My friends Vincent and Tamara were there too, with Vincent professionally dealing with his customers and selling all sorts of quality items. Highlights included back issues of National Geographic circa 1994, a purple elephant with a leg missing, and a toy train....

Vincent at Vrijmarkt

After the vrijmarkt I went for a wander in the center and in the Jordaan, in search of photos, but was suprised how empty parts of the Jordaan were (and how unphotogenic the center was), so didn't come away with any shots. However on the way back to my bike, passed by the gay QDay festival on the Amstel, which as always was a great excuse for people to dress up as Queens for a Day..... came across many people dressed as Queen Beatrix, and others clothed as Dancing Girls/Guys....

Queen for a day

Photographically, I decided to stick with a single prime for the day, and went with the 10,5mm Fisheye. When used close up this gives powerful images, and also includes a lot of the background to add to the atmosphere of the image. The images shot here were taken using fill in flash, since I find the fisheye accentuates areas in the shade, so a nice pop of flash does wonders.....

Wednesday 18 April 2007

Dust Bunnies and Sensor Cleaning


Dust Bunnies
Originally uploaded by DigitalHeMan.
One of the negative sides of using a digital SLR for photography is the effect of dust bunnies. This is a condition that occurs when particles or specks of dust end up inside the camera body and on the sensor. Unfortunately it is very difficult to avoid getting dust on the sensor, since unless the lenses are changed in a class 10 clean station, dust is going to get inside the camera body, and ultimately on the sensor.

The effect of dust can be greatly magnified, depending on the aperture that is used to take the photo. With a very wide aperture (i.e. f/1.4 - f/4) the effects generally won't be noticable, but as soon as the aperture is changed to give greater depth of field, for example in landscape photography, the dust particles become more evident, and can often be seen in a light blue sky on a bright day.....

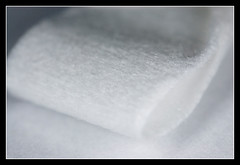
One area of digital photography that has a big problem with dust is macro photography. Since depth of field is greatly reduced the closer the focusing point is to the object, macro photography requires the use of a narrow aperture, often in the range of f/16 - f/22, in order to get enough of the image in focus, and then the dust bunnies start intruding into the image. This is evident in the first photo in this blog entry, which was shot at f/18, where each of the small black circles are caused by particles on the sensor (you might need to click the photo to see a larger version where the dust is more evident).

Now of course, a photo like this could be fixed in post processing (take for example the shot here, which was taken the same day, and had the same problems with the dust spots on the raw image, but was fixed by playing with levels and using the heal tool in Photoshop) but that takes time, so it is better to start off an important photo session with a clean sensor......

First to check if your sensor needs cleaning - find a white wall, set your camera to f/22, and take a photo of the wall in good light. Then look at the picture at 100% on the computer, and see if you have any dust bunnies as with the photo above. If you do, chances are cleaning the sensor will help you....

The first way to clean the sensor is to use a air blower, like the Giotto Pocket Rocket, which can get rid of many of the looser dust particles. Technique here is important though - if your camera has a mirror lock up function, use it, or otherwise use the bulb exposure setting, and make sure you hold your finger on the shutter button as you are cleaning to make sure the mirror is out of the way. Then hold the camera with the sensor pointing downwards, and squirt a few puffs of air into the chamber. It is important that your sensor is pointing down, as this will help any dust particles to fall out of the camera, as opposed to just being moved around inside the camera. ***NOTE*** Do NOT use canned air to clean the sensor - this is actually liquid air, and will cause more damage than good.....

Now take another test picture of the wall - if the dust bunny situation has improved, great, otherwise you might need to use a more intensive method to clean the sensor.

The way I do it is to use is Sensor Swabs/Pec Pads (see picture), with Eclipse optic solution, which is a methanol based solution.

(Edit 2008: Some newer cameras, for example the Nikon D300 and D3, now use Tin Oxide coatings on the sensor. You shouldn't use the standard Eclipse fluid for these cameras, instead use Eclipse E2)
Sensor Swab

If you buy the swabs, there are instructions on the packet, which I advise you to read, but in short the procedure is to put a few drops of the fluid on each side of the swab, then lift the mirror as before, and clean the sensor with a reasonable amount of pressure by moving from one side to the other of the sensor in one sweep, and then back again, using the other side of the swab. This should be enough to get the sensor clean, but remount your lens, take another test shot of the wall, and if that hasn't helped, clean the sensor again.

A note of precaution - cleaning the sensor using a liquid sounds risky, and of course it can be - a single scratch on the sensor is going to make the camera pretty much unusable, so it is important to take care when cleaning it. Only use sensor swabs once - they come in sterile packages, and should only be opened when they are about to be used. Also make sure you buy the correct size sensor swab for your model camera (for Nikon D series this is Sensor Swab size 2), as using a swab that is too large could damage other parts of the camera, and using one that is too small won't do the job properly....

But realistically the hot mirror filter that is in front of the sensor is pretty rugged, and it would take quite some effort to be able to scratch it. Give it a go - you will be impressed how easy it can be to get your sensor back in tip top clean condition.......
Monday 9 April 2007

Spring time


Muscari
Originally uploaded by DigitalHeMan.
So, Easter has been and gone, but in Holland the last weeks signalled a change in the weather and we are now experiencing bright spring days, just the right weather for flowers to spring into bloom. Of course the Netherlands is well known for having the right weather for cultivating flower blooms, and the world famous tourist attraction, Keukenhof, is only testament to that, attracting thousands of tourists every day.

One of our friends gave us a muscari plant recently, and it also burst into bloom this weekend. Whilst it hasn't produced the deep blue blooms that are often associated with this particular flower, it nevertheless has given me a perfect subject to play around with my camera, and some of the results can be seen in my flickr photostream.

I am lucky to have managed to obtain a good secondhand copy of the Nikon 70-180mm F/4.5-5.6 Micro zoom before they either disappear from the face of the earth, or begin to command insane prices on ebay (Nikon recently discontinued this, their only Micro zoom, leaving only fixed focal length macros in their collection) and the flexibility of the zoom makes this an ideal lens for flower photography, and allows the photographer to get in much closer than just a bloom or a petal.

There are a number of choices to make with macro photography. Firstly the light source - should it be artificial, or available light? When shooting in the great outdoors, the subject and it's surroundings often dictate this, since any subject movement close up is greatly amplified, and needs a high shutter speed in order to freeze it, which is not always possible, so flash gives a number of advantages.

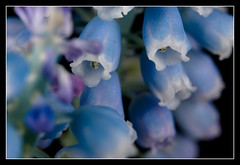
When using flash for macro, a close up flash kit such as the Nikon SB-R1(C1) is ideal. The top shot accompanying this blog was taken with the SB-R1, and two SB-R200 light sources either side of the lens. Due to the size of the muscari blooms, I was also shooting with the PK-13 (27,5mm) extension tube, and the Nikon 6T close up lens, and I wanted to get the in focus blooms to stand out a bit from the background. Now one of the nice things with the SB-R1 kit is that light fall off is pretty quick, so you end up with a nice black background, but in this case it wasn't happening initially, as the ambient light was too high, so I stepped the shutter speed up to 1/250s to aid the separation. (this also works inversely - by using slow shutter sync you can also balance the ambient light to give the background detail as well)

However, such a close up flash kit isn't always necessary. Today I was at Keukenhof, where wielding the Sb-R1 around would have been impractical, so instead I worked with the SB-800, but took it off camera and used the SC-17 connecting cable so that I could control where the light was falling on the subject. Works just as well, and with Nikon's advanced TTL flash, exposures were spot on.

Muscari

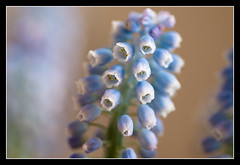
The second shot was taken with ambient light. This required a longer exposure to balance the exposure, and I ended up shooting at 1/3s. This gave the nice effect that the background (a white wall) was also exposed well, and I felt this gave the photo a dreamy quality. Of course outside this shot wouldn't have been possible, as even the slightest breeze would have left the picture unsharp, but there is nothing wrong with shooting specimens in a controlled environment inside (assuming of course you haven't taken the flowers from the wild with the sole intention of photographing them ;)

Another choice to be made with macro photography is the aperture to be used. This will have a dramatic effect on how much of the picture will end up being in focus, since the depth of field in macro photography is greatly reduced. Take for example the two shots accompagnying this blog - the first was shot at f/16, leaving a fair amount of the bloom in focus, whereas the second one was shot at f/5.6, leaving very few of the blooms sharp. In my experience, the more 'artistic' shots will use a lower aperture, whereas the 'documentary' shots will be shot at higher apertures.

In the age of digital SLR photography, shooting higher apertures brings its own challenges in the form of dust bunnies. It is an unfortunate fact that sensors do collect dust over time, due to their static charge, and regardless of how carefully lenses are changed, dust will end up on the sensor. You can check for dust on your sensor by shooting a white wall at f/16 or higher, and you will probably be suprised by the results. During 'normal' photography, you are less likely to notice the dust since (at least in my case) you don't use the higher apertures so often, but since macro photography means you are more likely to, this either means cleaning the sensor before a macro session, or using spot removal in Photoshop or Lightroom to try and remove the spots in post processing.

Needless to say, the use of a sturdy tripod and a cable release are imperative in order to get sharp results, but I'll leave that for another day.......