One way I like to separate my subject from the background is by using the magic eraser and standard eraser tools in Photoshop. With Magic Eraser I am able to click on a single point in an image and remove that patch of colour from the image that I am working on, leaving a transparent layer in it's place. I can then fine tune the area that I have deleted using the standard eraser tool.
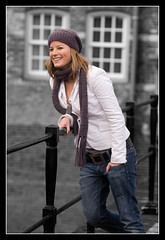
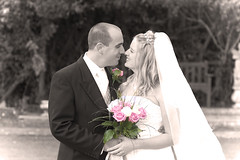
The way I like to use this with portrait photography, such as in the examples here, is to make a duplicate layer of the image, and then turn the background layer into a black and white image. Then as I erase the top layer, I am left with the black and white image showing through underneath.
It is important to have crisp, well defined edges between the black and white layer, and the colour layer, so I will normally get as close as possible with the eraser, and then zoom in on the image, and get really close, so that the only colour left in the image is the part that I wish to highlight. Toggling the background layer between visible and invisible can help to see parts that I have missed.
This can take some practice to get right, and an image created in this way will need a lot more time than a 'normal' image, but I think the results are worth the extra effort.


1 comment:
In stead of going B/W for the background, I sometimes just blur it (never too much), and add some additional contrast to the subject.
Post a Comment