
The effect of dust can be greatly magnified, depending on the aperture that is used to take the photo. With a very wide aperture (i.e. f/1.4 - f/4) the effects generally won't be noticable, but as soon as the aperture is changed to give greater depth of field, for example in landscape photography, the dust particles become more evident, and can often be seen in a light blue sky on a bright day.....
One area of digital photography that has a big problem with dust is macro photography. Since depth of field is greatly reduced the closer the focusing point is to the object, macro photography requires the use of a narrow aperture, often in the range of f/16 - f/22, in order to get enough of the image in focus, and then the dust bunnies start intruding into the image. This is evident in the first photo in this blog entry, which was shot at f/18, where each of the small black circles are caused by particles on the sensor (you might need to click the photo to see a larger version where the dust is more evident).
Now of course, a photo like this could be fixed in post processing (take for example the shot here, which was taken the same day, and had the same problems with the dust spots on the raw image, but was fixed by playing with levels and using the heal tool in Photoshop) but that takes time, so it is better to start off an important photo session with a clean sensor......
First to check if your sensor needs cleaning - find a white wall, set your camera to f/22, and take a photo of the wall in good light. Then look at the picture at 100% on the computer, and see if you have any dust bunnies as with the photo above. If you do, chances are cleaning the sensor will help you....
The first way to clean the sensor is to use a air blower, like the Giotto Pocket Rocket, which can get rid of many of the looser dust particles. Technique here is important though - if your camera has a mirror lock up function, use it, or otherwise use the bulb exposure setting, and make sure you hold your finger on the shutter button as you are cleaning to make sure the mirror is out of the way. Then hold the camera with the sensor pointing downwards, and squirt a few puffs of air into the chamber. It is important that your sensor is pointing down, as this will help any dust particles to fall out of the camera, as opposed to just being moved around inside the camera. ***NOTE*** Do NOT use canned air to clean the sensor - this is actually liquid air, and will cause more damage than good.....
Now take another test picture of the wall - if the dust bunny situation has improved, great, otherwise you might need to use a more intensive method to clean the sensor.
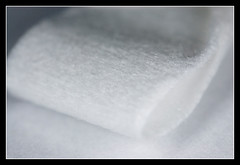
The way I do it is to use is Sensor Swabs/Pec Pads (see picture), with Eclipse optic solution, which is a methanol based solution.
(Edit 2008: Some newer cameras, for example the Nikon D300 and D3, now use Tin Oxide coatings on the sensor. You shouldn't use the standard Eclipse fluid for these cameras, instead use Eclipse E2)
If you buy the swabs, there are instructions on the packet, which I advise you to read, but in short the procedure is to put a few drops of the fluid on each side of the swab, then lift the mirror as before, and clean the sensor with a reasonable amount of pressure by moving from one side to the other of the sensor in one sweep, and then back again, using the other side of the swab. This should be enough to get the sensor clean, but remount your lens, take another test shot of the wall, and if that hasn't helped, clean the sensor again.
A note of precaution - cleaning the sensor using a liquid sounds risky, and of course it can be - a single scratch on the sensor is going to make the camera pretty much unusable, so it is important to take care when cleaning it. Only use sensor swabs once - they come in sterile packages, and should only be opened when they are about to be used. Also make sure you buy the correct size sensor swab for your model camera (for Nikon D series this is Sensor Swab size 2), as using a swab that is too large could damage other parts of the camera, and using one that is too small won't do the job properly....
But realistically the hot mirror filter that is in front of the sensor is pretty rugged, and it would take quite some effort to be able to scratch it. Give it a go - you will be impressed how easy it can be to get your sensor back in tip top clean condition.......


No comments:
Post a Comment