For reasons of space and running costs, I have never had reason to purchase a colour photo printer for home use. Although having my own printer would give me a lot more flexibility in to what I printed and when, I feel the cost per print is not much different to various online services.
So over time I have tried out a number of online photo services in the Netherlands, but have now finally found one company that, after a number of positive experiences, am going to stick with.
The company, ProFotoNet, a division of FotoSystems in Gouda, has a very simple to use website. It is possible to either download some software (for Windows) or use their online tool (for Mac users) to upload the pictures to their server.
Previously, Mac users were a bit limited to the browsers they could use to upload their pictures, but with the latest version of the online software I have successfully uploaded with both Mozilla variants (Flock) and Safari.
The quality of the images is stunning - they print everything on Kodak Endura paper, and I choose the Endura Metallica finish, which has a layer of silver in the paper to give certain colours a metallic look when held to the light. One of the reasons that the colours are so good, and can accurately represent the image as it is on the screen, is that ProFotoNet provides icc calibration profiles, to which the images can be converted before they are uploaded. But also without these profiles, providing the images are uploaded in either AdobeRGB or sRGB, they will do the conversion for you.
The best thing about the service is the price - a 10x15cm print is only 0,32€, a 20x30 print on Endura Metallic is 2,99€, and a 30x45cm print comes in at 7,50€. Admittedly this is a bit more expensive than somewhere like the Hema, but this is a pro service, and delivers pro results.
A couple of other things worth mentioning - firstly the speed: recently I placed an order at 10pm on Sunday evening, and received the order Tuesday morning by 10am. This is normal for ProFotoNet, I think they mention on their website that if images are uploaded by 3pm, they will normally be shipped out the same day. Also the payment is very easy - the prints are made on credit, and an invoice is sent along with he prints, with the request to make payment within 14 days.
As I said, I have used a number of services in the Netherlands, but this one by far gives superior quality at reasonable prices......
Thursday, 16 August 2007
Sunday, 5 August 2007
Bird Photography in Scotland and Northumberland
It's been a couple of weeks now since I came back from a camping trip to Scotland and the North of England. The aim behind the trip was to photograph the puffins on the islands along the east coast before they all flew away again for the summer. We had decided to camp primarily as a cost saving exercise, but we hadn't expected the weather to be so incredibly poor as it was.
Campsites along the route were fairly easy to find, but this probably had something to do with the frequent deluges that were making the ground almost uncampable. We started off camping near St Andrews, since the trip we had initially planned to Bass Rock was rained off. A short distance from St Andrews is the port of Anstruther, from where the pleasure cruiser May Princess starts her 8km trip to the island.
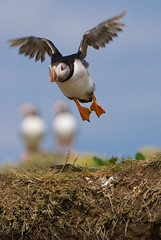
Again, due to the poor weather, two of our three planned trips were cancelled, but the third trip provided us with good enough weather to get a couple of good shots. It seems that the puffins are relatively 'tame', and don't seem to be frightened by the boat loads of tourists that are landing at regular intervals, but it is still necessary to keep a distance from them and show them respect. As for most of the remainder of the trip, the Nikon 200-400mm F/4G VR lens was invaluable here, and, when used together with my Gitzo 1348 and Markins M10/Wimberley Sidekick head was adequately supported to give me sharp images.
There are a number of spots on the island where it is possible to get a good position to shoot the birds, but I found keeping away from the crowds helped in getting better shots.
Our next trip was a couple of days later to Bass Rock. This is a trip organised for photographers by the Scottish Seabird Centre, and although rather pricey at around 80 pounds per person does give some very close up views of around 100000 pairs of Northern Gannets that inhabit this otherwise deserted island.
Landing on the island really depends on good weather and the right tides, as the 'dock' is merely a few iron rungs connected to the rock. It is a good idea to rationalise the amount of equipment taken onto the island, as everything needs to be carried to the top of the rock (and Beach Rollys are not welcome here....)
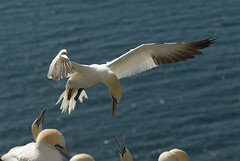
It is not necessary to have a really long telephoto on Bass Rock, as many good shots (especially flight shots) can be obtained with lenses such as the Nikon 70-200mm F/2.8G VR lens, as shown in the shot above. One thing to watch out for though is 'messages from above' as the birds don't seem to be toilet trained..... your equipment and clothing _will_ get covered in white spots however hard you try to avoid it......
The final destination for our group was the Farne and Staple Islands, back over the English border. Both of these islands belong to the National Trust, and it is worth noting that regardless of which tour operator sails you to the island, you will still need to pay a landing fee of around 4.50 pounds to enter each of the islands. Worth considering joining the National Trust if you are staying a couple of days, as this will pay for itself in the long run.
We camped just outside Seahouses, and used Billy Shiels MBE ferries to get us to and from the islands. There is a photographers trip which takes you to Staple Island in the morning, and then onto Inner Farne in the afternoon for around 25 pounds, and this is worth doing if you want to visit both islands. Note that there are no facilities on Staple, and only a basic toilet on Inner Farne, so any food to be consumed needs to be carried over from the main land.
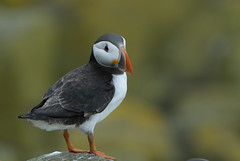
Again, the 200-400mm comes in useful on both of these islands, but nevertheless it is possible to get close to the puffins, especially on Inner Farne where the pathway runs inbetween the puffins' burrows.
In addition to the puffins, Inner Farne is also home to a flock of arctic terns. Note that the terns will attack people as they disembark from the boat and attempt to walk up onto the island. This is because they are nesting either side of the pathway, and wish to protect their young. The peck from the tern can draw blood, so it is a good idea to wear a hat or carry an umbrella (or, as we did, carry your tripod above your head)
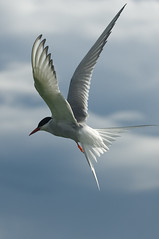
The three locations mentioned above definitely give the photographer a number of good opportunities for photographing puffins, terns, guillemots, and shags. With the exception of seasickness tablets and a good pair of walking shoes, there is nothing stopping anyone from taking images such as the ones displayed here.
Campsites along the route were fairly easy to find, but this probably had something to do with the frequent deluges that were making the ground almost uncampable. We started off camping near St Andrews, since the trip we had initially planned to Bass Rock was rained off. A short distance from St Andrews is the port of Anstruther, from where the pleasure cruiser May Princess starts her 8km trip to the island.
Again, due to the poor weather, two of our three planned trips were cancelled, but the third trip provided us with good enough weather to get a couple of good shots. It seems that the puffins are relatively 'tame', and don't seem to be frightened by the boat loads of tourists that are landing at regular intervals, but it is still necessary to keep a distance from them and show them respect. As for most of the remainder of the trip, the Nikon 200-400mm F/4G VR lens was invaluable here, and, when used together with my Gitzo 1348 and Markins M10/Wimberley Sidekick head was adequately supported to give me sharp images.
There are a number of spots on the island where it is possible to get a good position to shoot the birds, but I found keeping away from the crowds helped in getting better shots.
Our next trip was a couple of days later to Bass Rock. This is a trip organised for photographers by the Scottish Seabird Centre, and although rather pricey at around 80 pounds per person does give some very close up views of around 100000 pairs of Northern Gannets that inhabit this otherwise deserted island.
Landing on the island really depends on good weather and the right tides, as the 'dock' is merely a few iron rungs connected to the rock. It is a good idea to rationalise the amount of equipment taken onto the island, as everything needs to be carried to the top of the rock (and Beach Rollys are not welcome here....)
It is not necessary to have a really long telephoto on Bass Rock, as many good shots (especially flight shots) can be obtained with lenses such as the Nikon 70-200mm F/2.8G VR lens, as shown in the shot above. One thing to watch out for though is 'messages from above' as the birds don't seem to be toilet trained..... your equipment and clothing _will_ get covered in white spots however hard you try to avoid it......
The final destination for our group was the Farne and Staple Islands, back over the English border. Both of these islands belong to the National Trust, and it is worth noting that regardless of which tour operator sails you to the island, you will still need to pay a landing fee of around 4.50 pounds to enter each of the islands. Worth considering joining the National Trust if you are staying a couple of days, as this will pay for itself in the long run.
We camped just outside Seahouses, and used Billy Shiels MBE ferries to get us to and from the islands. There is a photographers trip which takes you to Staple Island in the morning, and then onto Inner Farne in the afternoon for around 25 pounds, and this is worth doing if you want to visit both islands. Note that there are no facilities on Staple, and only a basic toilet on Inner Farne, so any food to be consumed needs to be carried over from the main land.
Again, the 200-400mm comes in useful on both of these islands, but nevertheless it is possible to get close to the puffins, especially on Inner Farne where the pathway runs inbetween the puffins' burrows.
In addition to the puffins, Inner Farne is also home to a flock of arctic terns. Note that the terns will attack people as they disembark from the boat and attempt to walk up onto the island. This is because they are nesting either side of the pathway, and wish to protect their young. The peck from the tern can draw blood, so it is a good idea to wear a hat or carry an umbrella (or, as we did, carry your tripod above your head)
The three locations mentioned above definitely give the photographer a number of good opportunities for photographing puffins, terns, guillemots, and shags. With the exception of seasickness tablets and a good pair of walking shoes, there is nothing stopping anyone from taking images such as the ones displayed here.
Tuesday, 19 June 2007
Use of flash in wildlife photography
One accessory I found myself using more than I thought whilst on safari was my flash gun. I use a couple of Nikon SB-800, and love the capabilities of the Nikon CLS system, together with the intelligence of the TTL-BL mode, which provides perfect fill every time......
Now, in my opinion, there are three main things that flash can be used for in digital photography - i) providing light where there isn't enough ii) providing fill light for heavy shadows, and iii) stopping the action.
When I don't have enough light in the wild, it is generally time to call it a day and go home, as the effect you get by trying to light up the darkness (especially at dusk) is very artificial, and doesn't really work (*), but the other two situations lend themselves to flash very well.
There are a number of ways you can use flash to provide fill. Firstly, as in the case with the cobra photograph here, a small flash will take the darkness out of the shadow areas on a subject, and provide just enough light to make the subject pop. With animal photography, this light will normally have the added bonus of a catchlight in the subject's eye. In these sort of situations, I will set the camera in aperture priority mode to provide the appropriate amount of depth of field, and use a spot of negative flash exposure compensation, normally around -1 to -1 2/3 stops so that the flash doesn't overpower the shot.
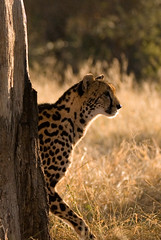
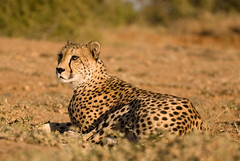
A second example of using fill is shown in the king cheetah shot. Here, the subject is backlit, and a normal exposure would leave the cheetah's face in shadow, however by using fill flash, the SB-800 automatically works out the correct amount of illumination to get the exposure correct.
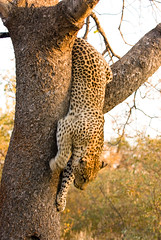
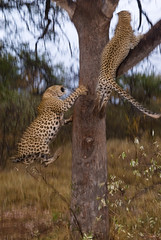
The third example of using flash is to stop motion. Because the duration of a typical flash is very short (anywhere from 1/1000 to 1/50000 of a second) it can be used in combination with a slower shutter speed to freeze the action in a frame. I used this method in my shot of the leopards in the tree to give the viewer the impression of movement in the frame. Here I chose a slow shutter speed (around 1/50s), together with flash. Then during the shot I panned the movement of the leopards ascending the tree. This gave the result that the background was blurred, due to my panning, but the short duration of the flash froze the action of the animals, giving a dramatic image. The ghosting behind the animals also adds to the image. Note that if you do want to have movement 'streaks' behind the subject, it is important to set the flash to rear curtain sync, so that the flash freezes the movement at the end of the exposure, as oppose to the start of the exposure (which would lead to the blur being in front of the subject)
The use of flash is a very creative tool in modern day photography, and is a skill that I am only just starting to appreciate. If you have an opinion on this, I would love to hear it......
(* there are definitely situations where the use of flash in complete darkness can be useful, but this typically requires a little more thought than simply placing the flash in the hotshoe, and is not a situation that I have had the chance to be in yet)

Now, in my opinion, there are three main things that flash can be used for in digital photography - i) providing light where there isn't enough ii) providing fill light for heavy shadows, and iii) stopping the action.
When I don't have enough light in the wild, it is generally time to call it a day and go home, as the effect you get by trying to light up the darkness (especially at dusk) is very artificial, and doesn't really work (*), but the other two situations lend themselves to flash very well.
There are a number of ways you can use flash to provide fill. Firstly, as in the case with the cobra photograph here, a small flash will take the darkness out of the shadow areas on a subject, and provide just enough light to make the subject pop. With animal photography, this light will normally have the added bonus of a catchlight in the subject's eye. In these sort of situations, I will set the camera in aperture priority mode to provide the appropriate amount of depth of field, and use a spot of negative flash exposure compensation, normally around -1 to -1 2/3 stops so that the flash doesn't overpower the shot.
A second example of using fill is shown in the king cheetah shot. Here, the subject is backlit, and a normal exposure would leave the cheetah's face in shadow, however by using fill flash, the SB-800 automatically works out the correct amount of illumination to get the exposure correct.
The third example of using flash is to stop motion. Because the duration of a typical flash is very short (anywhere from 1/1000 to 1/50000 of a second) it can be used in combination with a slower shutter speed to freeze the action in a frame. I used this method in my shot of the leopards in the tree to give the viewer the impression of movement in the frame. Here I chose a slow shutter speed (around 1/50s), together with flash. Then during the shot I panned the movement of the leopards ascending the tree. This gave the result that the background was blurred, due to my panning, but the short duration of the flash froze the action of the animals, giving a dramatic image. The ghosting behind the animals also adds to the image. Note that if you do want to have movement 'streaks' behind the subject, it is important to set the flash to rear curtain sync, so that the flash freezes the movement at the end of the exposure, as oppose to the start of the exposure (which would lead to the blur being in front of the subject)
The use of flash is a very creative tool in modern day photography, and is a skill that I am only just starting to appreciate. If you have an opinion on this, I would love to hear it......
(* there are definitely situations where the use of flash in complete darkness can be useful, but this typically requires a little more thought than simply placing the flash in the hotshoe, and is not a situation that I have had the chance to be in yet)
Thursday, 14 June 2007
Gear to pack on a safari
I recently came back from a photo safari at Tshukudu Lodge in Hoedspruit, South Africa, organised by FotoCampus. In the first of a series of articles about the safari, I thought I would write about the photo gear that I took with me, what was useful, and what was not so useful.....
Due to the current luggage restrictions on airlines, it was necessary to be a little bit careful with what I carried with me. So I decided to purchase a Think Tank Airport International roller case to take my hand luggage on the plane with me. I figured that since my hand luggage would be weighing around 16-18kg, anything I could do to make it look lighter would help. And since rolling 16kg around on wheels looks a lot more effortless than carrying it on your back, that helped my decision.....
So then I was left with the decision of what to take with me on the plane, and what to have in my hold luggage. Obvioulsy my main lenses and camera bodies would stay with me, and I opted to put all chargers, cleaning equipment, batteries, monopod etc in the hold. This way I figured that if my hold luggage were to get lost or delayed, at least I would still be able to shoot, and there would be enough other people there who I could borrow chargers from if necessary.
I packed the following gear:
2x D200 bodies, both fitted with MB-D200 battery grips - I think the battery grip on the D200 makes handling so much better, and makes it a lot easier to take photos in portrait format. Definitely a worth €175 upgrade
200-400mm F/4G VR lens - this was almost permanently attached to one of the D200 bodies, and was used for around 45% of the shots
70-200mm F/2.8G VR lens - this was attached to the second D200 and was also used for around 45% of the shots
The above two lenses are, in my opinion, invaluable on a safari, since they give a good coverage of the range you will likely to be shooting at. 200-400 is especially useful for birding shots, but it is important to support the lens well. Since there was no space in the safari vehicle for a tripod (in fact I didn't take one with me) I had the choice between using a bean bag, or a monopod. I filled the beanbag with around 4kg of sugar beans, and found this to be a perfect solution. The roll bars on the vehicle made a good support, either sitting or standing, and by putting the bean bag on top, I found I could rest the 200-400 lens on the bag and get sharp shots.
The 70-200 can be used hand held, and at a stretch can be fitted with a TC-17e to give a reasonable alternative to the 200-400.
17-55mm F/2.8G lens - Used for some landscape shots, and when I had the opportunity to get closer to some of the animals (jn Tshukudu they have some animals as part of breeding programmes, and it is normally possible to get fairly close to them, albeit with a fence in between. Also good for 'atmosphere' shots of other participants, and for when the elephants charge the vehicle.....
10.5mm F/2.8G fisheye lens - Used a couple of times, but could have been left at home, not really a safari lens. However, due to it's small size, it doesn't cost any space to take it with, so it invariably finds it's way into my bag. Used for a couple of landscape shots.
12-24mm F/4G lens, 85mm F/1.4D lens - Didn't use either of these lenses, next time I will leave them at home....
TC-14e and TC-17e teleconverters - I really expected that I would use my converters, but didn't take a single shot with them. Wouldn't leave them at home, as they are always useful as a last resort.....
SB-800 flash - Used more than I expected to provide fill to darker subjects, or for freezing the movement of some subjects. I used this in conjunction with the Nikon SD-8a battery pack, which supplements the in flash battery power with 6 additional cells, and found this to provide a welcome improvement to flash recycling times.
Monopod - as mentioned earlier, good camera support is vital, and I used my Gitzo 1578L for this
Bean Bag - I took a bean bag that I had purchased for €10 locally, and then filled it with beans once I arrived. Mine is around 25x20 cm, and I found this to be just the right size. If you make your own, you will probably find using a zip to close it works considerably better than velcro or other fastners.
Cleaning kit - My sensor actually remained relatively clean, but I took my Eclipse fluid and sensor swabs with me just in case. I also took a microfiber lens cloth, and a rocket blower to clean the gear at the end of each day
Photo vest - A good photo vest with a number of pockets is useful. Each drive I carried my cameras in my hand, and put all the other accessories, lenses, and flash in the photo vest. There isn't really space to take a camera bag in the vehicle, so best to avoid taking one
Memory - I had 4x 4Gig cards with me, and this was more than enough for my two bodies. At the end of each drive I would copy the contents of the cards to two external 120Gig drives, via my MacBook Pro.
Batteries - I took seven EN-EL3e batteries with me, but found I didn't use more than four in a day shooting.....
All in all, the equipment worked fine, and I was happy with the results that I achieved. I had a couple of issues with the D200 bodies and blinking battery syndrome, but was solved by switching lenses between bodies, and the wheel fell off the Think Tank. However when I returned, Think Tank were very apologetic and are sending me a replacement wheel kit. The problem shouldn't have occurred in the first place, but at least it was rectified through good customer service.
So did I forget anything? I think the gear I took covered pretty much all of the photo opportunities that I had. However I think taking a polarising filter would have been useful, as this would allow for better saturation in some photos. A tripod would have also been useful for some long exposure/night time opportunities, however it's use would have not been possible during the day drives, and would have been a hassle to transport through the airport (and the extra weight would have definitely ended up in having to pay for excess baggage....)
Due to the current luggage restrictions on airlines, it was necessary to be a little bit careful with what I carried with me. So I decided to purchase a Think Tank Airport International roller case to take my hand luggage on the plane with me. I figured that since my hand luggage would be weighing around 16-18kg, anything I could do to make it look lighter would help. And since rolling 16kg around on wheels looks a lot more effortless than carrying it on your back, that helped my decision.....
So then I was left with the decision of what to take with me on the plane, and what to have in my hold luggage. Obvioulsy my main lenses and camera bodies would stay with me, and I opted to put all chargers, cleaning equipment, batteries, monopod etc in the hold. This way I figured that if my hold luggage were to get lost or delayed, at least I would still be able to shoot, and there would be enough other people there who I could borrow chargers from if necessary.
I packed the following gear:
2x D200 bodies, both fitted with MB-D200 battery grips - I think the battery grip on the D200 makes handling so much better, and makes it a lot easier to take photos in portrait format. Definitely a worth €175 upgrade
200-400mm F/4G VR lens - this was almost permanently attached to one of the D200 bodies, and was used for around 45% of the shots
70-200mm F/2.8G VR lens - this was attached to the second D200 and was also used for around 45% of the shots
The above two lenses are, in my opinion, invaluable on a safari, since they give a good coverage of the range you will likely to be shooting at. 200-400 is especially useful for birding shots, but it is important to support the lens well. Since there was no space in the safari vehicle for a tripod (in fact I didn't take one with me) I had the choice between using a bean bag, or a monopod. I filled the beanbag with around 4kg of sugar beans, and found this to be a perfect solution. The roll bars on the vehicle made a good support, either sitting or standing, and by putting the bean bag on top, I found I could rest the 200-400 lens on the bag and get sharp shots.
The 70-200 can be used hand held, and at a stretch can be fitted with a TC-17e to give a reasonable alternative to the 200-400.
17-55mm F/2.8G lens - Used for some landscape shots, and when I had the opportunity to get closer to some of the animals (jn Tshukudu they have some animals as part of breeding programmes, and it is normally possible to get fairly close to them, albeit with a fence in between. Also good for 'atmosphere' shots of other participants, and for when the elephants charge the vehicle.....
10.5mm F/2.8G fisheye lens - Used a couple of times, but could have been left at home, not really a safari lens. However, due to it's small size, it doesn't cost any space to take it with, so it invariably finds it's way into my bag. Used for a couple of landscape shots.
12-24mm F/4G lens, 85mm F/1.4D lens - Didn't use either of these lenses, next time I will leave them at home....
TC-14e and TC-17e teleconverters - I really expected that I would use my converters, but didn't take a single shot with them. Wouldn't leave them at home, as they are always useful as a last resort.....
SB-800 flash - Used more than I expected to provide fill to darker subjects, or for freezing the movement of some subjects. I used this in conjunction with the Nikon SD-8a battery pack, which supplements the in flash battery power with 6 additional cells, and found this to provide a welcome improvement to flash recycling times.
Monopod - as mentioned earlier, good camera support is vital, and I used my Gitzo 1578L for this
Bean Bag - I took a bean bag that I had purchased for €10 locally, and then filled it with beans once I arrived. Mine is around 25x20 cm, and I found this to be just the right size. If you make your own, you will probably find using a zip to close it works considerably better than velcro or other fastners.
Cleaning kit - My sensor actually remained relatively clean, but I took my Eclipse fluid and sensor swabs with me just in case. I also took a microfiber lens cloth, and a rocket blower to clean the gear at the end of each day
Photo vest - A good photo vest with a number of pockets is useful. Each drive I carried my cameras in my hand, and put all the other accessories, lenses, and flash in the photo vest. There isn't really space to take a camera bag in the vehicle, so best to avoid taking one
Memory - I had 4x 4Gig cards with me, and this was more than enough for my two bodies. At the end of each drive I would copy the contents of the cards to two external 120Gig drives, via my MacBook Pro.
Batteries - I took seven EN-EL3e batteries with me, but found I didn't use more than four in a day shooting.....
All in all, the equipment worked fine, and I was happy with the results that I achieved. I had a couple of issues with the D200 bodies and blinking battery syndrome, but was solved by switching lenses between bodies, and the wheel fell off the Think Tank. However when I returned, Think Tank were very apologetic and are sending me a replacement wheel kit. The problem shouldn't have occurred in the first place, but at least it was rectified through good customer service.
So did I forget anything? I think the gear I took covered pretty much all of the photo opportunities that I had. However I think taking a polarising filter would have been useful, as this would allow for better saturation in some photos. A tripod would have also been useful for some long exposure/night time opportunities, however it's use would have not been possible during the day drives, and would have been a hassle to transport through the airport (and the extra weight would have definitely ended up in having to pay for excess baggage....)
Saturday, 19 May 2007
Gear Review: Nikon 50mm F/1.8D lens
I've got thousands of Euros worth of camera lenses. All of them Nikon, and all of them great in one way or another. But in terms of which lens gives me the best bang for the buck, it's got to be the standard 50mm F/1.8D lens..... it's sharpness, contrast, and colour rendition is equal to many of my lenses costing ten times the price. It's great as a low light lens also, with a maximum aperture of F1.8, meaning it can still keep going in low light situations where other lenses have given up a long time ago. But probably the best thing about this lens is it's price: only 100€ to you, sir....
A 50mm lens has pretty much always been in Nikon's lens line up, and in the times of 35mm film, and before zoom lenses had become as popular as they are today, was considered a 'standard' lens to have - the reason for this was, at 50mm, it gave the closest field of view to that of the human eye, which for most people is around 55mm. This meant that in terms of perspective, what you saw through the viewfinder of a 35mm SLR fitted with a 50mm prime was pretty much as you saw it when the camera was taken away.
In the 90's, as the quality of zoom lenses became better, and their respective prices lower, the 50mm lost it's popularity, as people preferred to go for something a little more flexible, but now we are into the digital age, with a crop factor of 1.5x, the Nikon 50mm becomes a useful 75mm in 35mm terms. So right in the middle of the range considered good portrait lenses in terms of perspective.
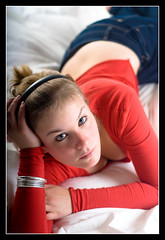
The first picture in this blog entry, taken of Sigal using studio lighting, is an example of this. It enabled me to get a good working distance to the model, and by using selective focussing and a wide aperture (in this case f2.2), I was able to throw most of the image out of focus, keeping the eyes sharp, and making sure that is what the viewer's attention is naturally drawn to. If I recall correctly, with this image I had absolutely no need to apply any sharpening in post processing.
Due to the size of the lens, it always goes into my bag when I go out taking portraits, and invariably gets as much use as its bigger brother the 85mm f1.4D.
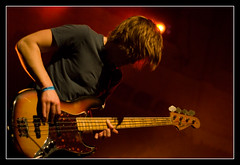
Another situation where I have found having the nifty 50 in my kit bag invaluable is when shooting gigs. In fact, so much so that now I typicaly go to gigs with just the 50mm attached, leaving all the other lenses at home. This has the advantage of a camera setup that is relatively compact, and no need to worry about all the other gear getting knocked or covered in beer. And again the field of view of the 50 is just right to get frame filling portraits, providing you have managed to get a good position near the front of the stage, as can be seen here in the shot of Air Traffic when they played at Paradiso in Amsterdam earlier this year. But of course the most important characteristic of shooting in low light situations such as concert halls, is this lens opens right up, giving enough light for the AF to work, and a wide enough aperture to keep the shutter speed high enough to get sharp results.
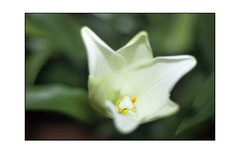
The gig shot was taken wide open, at f1.8, as was the lily above. The 50 can focus relatively close, and gives good opportunity for creative shots with limited depth of field, allowing the photographer to focus on a specific part of the image, and leave everything else to fade away to blur. The 50 is also an ideal way into macro photography, since it can be used either in combination with an extension tube, with a close up filter, or with a lens reversing ring (such as the Nikon BR-6)
So again, this is a great little lens that is small enough to take anywhere, sharp enough to cut your finger, and cheap enough to fit into anyone's budget. The only downside of the lens is that it hasn't yet been upgraded to a AF-S lens, but in the sort of photography I use this lens for, fast focussing speed isn't that important.
And for those of you shooting Canon, I've heard equally good things about their 50mm F1.8 EF lens...... :)
You can see more examples of shots taken with this lens in my flickr photostream.
A 50mm lens has pretty much always been in Nikon's lens line up, and in the times of 35mm film, and before zoom lenses had become as popular as they are today, was considered a 'standard' lens to have - the reason for this was, at 50mm, it gave the closest field of view to that of the human eye, which for most people is around 55mm. This meant that in terms of perspective, what you saw through the viewfinder of a 35mm SLR fitted with a 50mm prime was pretty much as you saw it when the camera was taken away.
In the 90's, as the quality of zoom lenses became better, and their respective prices lower, the 50mm lost it's popularity, as people preferred to go for something a little more flexible, but now we are into the digital age, with a crop factor of 1.5x, the Nikon 50mm becomes a useful 75mm in 35mm terms. So right in the middle of the range considered good portrait lenses in terms of perspective.
The first picture in this blog entry, taken of Sigal using studio lighting, is an example of this. It enabled me to get a good working distance to the model, and by using selective focussing and a wide aperture (in this case f2.2), I was able to throw most of the image out of focus, keeping the eyes sharp, and making sure that is what the viewer's attention is naturally drawn to. If I recall correctly, with this image I had absolutely no need to apply any sharpening in post processing.
Due to the size of the lens, it always goes into my bag when I go out taking portraits, and invariably gets as much use as its bigger brother the 85mm f1.4D.
Another situation where I have found having the nifty 50 in my kit bag invaluable is when shooting gigs. In fact, so much so that now I typicaly go to gigs with just the 50mm attached, leaving all the other lenses at home. This has the advantage of a camera setup that is relatively compact, and no need to worry about all the other gear getting knocked or covered in beer. And again the field of view of the 50 is just right to get frame filling portraits, providing you have managed to get a good position near the front of the stage, as can be seen here in the shot of Air Traffic when they played at Paradiso in Amsterdam earlier this year. But of course the most important characteristic of shooting in low light situations such as concert halls, is this lens opens right up, giving enough light for the AF to work, and a wide enough aperture to keep the shutter speed high enough to get sharp results.
The gig shot was taken wide open, at f1.8, as was the lily above. The 50 can focus relatively close, and gives good opportunity for creative shots with limited depth of field, allowing the photographer to focus on a specific part of the image, and leave everything else to fade away to blur. The 50 is also an ideal way into macro photography, since it can be used either in combination with an extension tube, with a close up filter, or with a lens reversing ring (such as the Nikon BR-6)
So again, this is a great little lens that is small enough to take anywhere, sharp enough to cut your finger, and cheap enough to fit into anyone's budget. The only downside of the lens is that it hasn't yet been upgraded to a AF-S lens, but in the sort of photography I use this lens for, fast focussing speed isn't that important.
And for those of you shooting Canon, I've heard equally good things about their 50mm F1.8 EF lens...... :)
You can see more examples of shots taken with this lens in my flickr photostream.
Monday, 30 April 2007
Queen for a day
Today (30th April) was Queen's Day. This is when the Dutch spend the day outside celebrating the (former) queen's birthday. This year we were blessed with good weather, so around 500000 people gathered in Amsterdam.
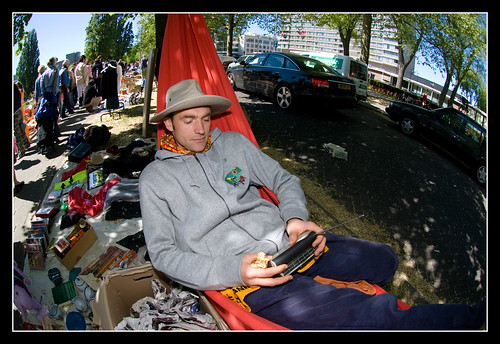
The day traditionally starts with the vrijmarkt, which is where anyone can set up a stand and sell whatever they feel like getting rid of. My friends Vincent and Tamara were there too, with Vincent professionally dealing with his customers and selling all sorts of quality items. Highlights included back issues of National Geographic circa 1994, a purple elephant with a leg missing, and a toy train....
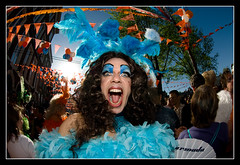
After the vrijmarkt I went for a wander in the center and in the Jordaan, in search of photos, but was suprised how empty parts of the Jordaan were (and how unphotogenic the center was), so didn't come away with any shots. However on the way back to my bike, passed by the gay QDay festival on the Amstel, which as always was a great excuse for people to dress up as Queens for a Day..... came across many people dressed as Queen Beatrix, and others clothed as Dancing Girls/Guys....

Photographically, I decided to stick with a single prime for the day, and went with the 10,5mm Fisheye. When used close up this gives powerful images, and also includes a lot of the background to add to the atmosphere of the image. The images shot here were taken using fill in flash, since I find the fisheye accentuates areas in the shade, so a nice pop of flash does wonders.....
The day traditionally starts with the vrijmarkt, which is where anyone can set up a stand and sell whatever they feel like getting rid of. My friends Vincent and Tamara were there too, with Vincent professionally dealing with his customers and selling all sorts of quality items. Highlights included back issues of National Geographic circa 1994, a purple elephant with a leg missing, and a toy train....
After the vrijmarkt I went for a wander in the center and in the Jordaan, in search of photos, but was suprised how empty parts of the Jordaan were (and how unphotogenic the center was), so didn't come away with any shots. However on the way back to my bike, passed by the gay QDay festival on the Amstel, which as always was a great excuse for people to dress up as Queens for a Day..... came across many people dressed as Queen Beatrix, and others clothed as Dancing Girls/Guys....
Photographically, I decided to stick with a single prime for the day, and went with the 10,5mm Fisheye. When used close up this gives powerful images, and also includes a lot of the background to add to the atmosphere of the image. The images shot here were taken using fill in flash, since I find the fisheye accentuates areas in the shade, so a nice pop of flash does wonders.....
Wednesday, 18 April 2007
Dust Bunnies and Sensor Cleaning
One of the negative sides of using a digital SLR for photography is the effect of dust bunnies. This is a condition that occurs when particles or specks of dust end up inside the camera body and on the sensor. Unfortunately it is very difficult to avoid getting dust on the sensor, since unless the lenses are changed in a class 10 clean station, dust is going to get inside the camera body, and ultimately on the sensor.
The effect of dust can be greatly magnified, depending on the aperture that is used to take the photo. With a very wide aperture (i.e. f/1.4 - f/4) the effects generally won't be noticable, but as soon as the aperture is changed to give greater depth of field, for example in landscape photography, the dust particles become more evident, and can often be seen in a light blue sky on a bright day.....
One area of digital photography that has a big problem with dust is macro photography. Since depth of field is greatly reduced the closer the focusing point is to the object, macro photography requires the use of a narrow aperture, often in the range of f/16 - f/22, in order to get enough of the image in focus, and then the dust bunnies start intruding into the image. This is evident in the first photo in this blog entry, which was shot at f/18, where each of the small black circles are caused by particles on the sensor (you might need to click the photo to see a larger version where the dust is more evident).
Now of course, a photo like this could be fixed in post processing (take for example the shot here, which was taken the same day, and had the same problems with the dust spots on the raw image, but was fixed by playing with levels and using the heal tool in Photoshop) but that takes time, so it is better to start off an important photo session with a clean sensor......
First to check if your sensor needs cleaning - find a white wall, set your camera to f/22, and take a photo of the wall in good light. Then look at the picture at 100% on the computer, and see if you have any dust bunnies as with the photo above. If you do, chances are cleaning the sensor will help you....
The first way to clean the sensor is to use a air blower, like the Giotto Pocket Rocket, which can get rid of many of the looser dust particles. Technique here is important though - if your camera has a mirror lock up function, use it, or otherwise use the bulb exposure setting, and make sure you hold your finger on the shutter button as you are cleaning to make sure the mirror is out of the way. Then hold the camera with the sensor pointing downwards, and squirt a few puffs of air into the chamber. It is important that your sensor is pointing down, as this will help any dust particles to fall out of the camera, as opposed to just being moved around inside the camera. ***NOTE*** Do NOT use canned air to clean the sensor - this is actually liquid air, and will cause more damage than good.....
Now take another test picture of the wall - if the dust bunny situation has improved, great, otherwise you might need to use a more intensive method to clean the sensor.
The way I do it is to use is Sensor Swabs/Pec Pads (see picture), with Eclipse optic solution, which is a methanol based solution.
(Edit 2008: Some newer cameras, for example the Nikon D300 and D3, now use Tin Oxide coatings on the sensor. You shouldn't use the standard Eclipse fluid for these cameras, instead use Eclipse E2)
If you buy the swabs, there are instructions on the packet, which I advise you to read, but in short the procedure is to put a few drops of the fluid on each side of the swab, then lift the mirror as before, and clean the sensor with a reasonable amount of pressure by moving from one side to the other of the sensor in one sweep, and then back again, using the other side of the swab. This should be enough to get the sensor clean, but remount your lens, take another test shot of the wall, and if that hasn't helped, clean the sensor again.
A note of precaution - cleaning the sensor using a liquid sounds risky, and of course it can be - a single scratch on the sensor is going to make the camera pretty much unusable, so it is important to take care when cleaning it. Only use sensor swabs once - they come in sterile packages, and should only be opened when they are about to be used. Also make sure you buy the correct size sensor swab for your model camera (for Nikon D series this is Sensor Swab size 2), as using a swab that is too large could damage other parts of the camera, and using one that is too small won't do the job properly....
But realistically the hot mirror filter that is in front of the sensor is pretty rugged, and it would take quite some effort to be able to scratch it. Give it a go - you will be impressed how easy it can be to get your sensor back in tip top clean condition.......
The effect of dust can be greatly magnified, depending on the aperture that is used to take the photo. With a very wide aperture (i.e. f/1.4 - f/4) the effects generally won't be noticable, but as soon as the aperture is changed to give greater depth of field, for example in landscape photography, the dust particles become more evident, and can often be seen in a light blue sky on a bright day.....
One area of digital photography that has a big problem with dust is macro photography. Since depth of field is greatly reduced the closer the focusing point is to the object, macro photography requires the use of a narrow aperture, often in the range of f/16 - f/22, in order to get enough of the image in focus, and then the dust bunnies start intruding into the image. This is evident in the first photo in this blog entry, which was shot at f/18, where each of the small black circles are caused by particles on the sensor (you might need to click the photo to see a larger version where the dust is more evident).
Now of course, a photo like this could be fixed in post processing (take for example the shot here, which was taken the same day, and had the same problems with the dust spots on the raw image, but was fixed by playing with levels and using the heal tool in Photoshop) but that takes time, so it is better to start off an important photo session with a clean sensor......
First to check if your sensor needs cleaning - find a white wall, set your camera to f/22, and take a photo of the wall in good light. Then look at the picture at 100% on the computer, and see if you have any dust bunnies as with the photo above. If you do, chances are cleaning the sensor will help you....
The first way to clean the sensor is to use a air blower, like the Giotto Pocket Rocket, which can get rid of many of the looser dust particles. Technique here is important though - if your camera has a mirror lock up function, use it, or otherwise use the bulb exposure setting, and make sure you hold your finger on the shutter button as you are cleaning to make sure the mirror is out of the way. Then hold the camera with the sensor pointing downwards, and squirt a few puffs of air into the chamber. It is important that your sensor is pointing down, as this will help any dust particles to fall out of the camera, as opposed to just being moved around inside the camera. ***NOTE*** Do NOT use canned air to clean the sensor - this is actually liquid air, and will cause more damage than good.....
Now take another test picture of the wall - if the dust bunny situation has improved, great, otherwise you might need to use a more intensive method to clean the sensor.
The way I do it is to use is Sensor Swabs/Pec Pads (see picture), with Eclipse optic solution, which is a methanol based solution.
(Edit 2008: Some newer cameras, for example the Nikon D300 and D3, now use Tin Oxide coatings on the sensor. You shouldn't use the standard Eclipse fluid for these cameras, instead use Eclipse E2)
If you buy the swabs, there are instructions on the packet, which I advise you to read, but in short the procedure is to put a few drops of the fluid on each side of the swab, then lift the mirror as before, and clean the sensor with a reasonable amount of pressure by moving from one side to the other of the sensor in one sweep, and then back again, using the other side of the swab. This should be enough to get the sensor clean, but remount your lens, take another test shot of the wall, and if that hasn't helped, clean the sensor again.
A note of precaution - cleaning the sensor using a liquid sounds risky, and of course it can be - a single scratch on the sensor is going to make the camera pretty much unusable, so it is important to take care when cleaning it. Only use sensor swabs once - they come in sterile packages, and should only be opened when they are about to be used. Also make sure you buy the correct size sensor swab for your model camera (for Nikon D series this is Sensor Swab size 2), as using a swab that is too large could damage other parts of the camera, and using one that is too small won't do the job properly....
But realistically the hot mirror filter that is in front of the sensor is pretty rugged, and it would take quite some effort to be able to scratch it. Give it a go - you will be impressed how easy it can be to get your sensor back in tip top clean condition.......
Monday, 9 April 2007
Spring time
So, Easter has been and gone, but in Holland the last weeks signalled a change in the weather and we are now experiencing bright spring days, just the right weather for flowers to spring into bloom. Of course the Netherlands is well known for having the right weather for cultivating flower blooms, and the world famous tourist attraction, Keukenhof, is only testament to that, attracting thousands of tourists every day.
One of our friends gave us a muscari plant recently, and it also burst into bloom this weekend. Whilst it hasn't produced the deep blue blooms that are often associated with this particular flower, it nevertheless has given me a perfect subject to play around with my camera, and some of the results can be seen in my flickr photostream.
I am lucky to have managed to obtain a good secondhand copy of the Nikon 70-180mm F/4.5-5.6 Micro zoom before they either disappear from the face of the earth, or begin to command insane prices on ebay (Nikon recently discontinued this, their only Micro zoom, leaving only fixed focal length macros in their collection) and the flexibility of the zoom makes this an ideal lens for flower photography, and allows the photographer to get in much closer than just a bloom or a petal.
There are a number of choices to make with macro photography. Firstly the light source - should it be artificial, or available light? When shooting in the great outdoors, the subject and it's surroundings often dictate this, since any subject movement close up is greatly amplified, and needs a high shutter speed in order to freeze it, which is not always possible, so flash gives a number of advantages.
When using flash for macro, a close up flash kit such as the Nikon SB-R1(C1) is ideal. The top shot accompanying this blog was taken with the SB-R1, and two SB-R200 light sources either side of the lens. Due to the size of the muscari blooms, I was also shooting with the PK-13 (27,5mm) extension tube, and the Nikon 6T close up lens, and I wanted to get the in focus blooms to stand out a bit from the background. Now one of the nice things with the SB-R1 kit is that light fall off is pretty quick, so you end up with a nice black background, but in this case it wasn't happening initially, as the ambient light was too high, so I stepped the shutter speed up to 1/250s to aid the separation. (this also works inversely - by using slow shutter sync you can also balance the ambient light to give the background detail as well)
However, such a close up flash kit isn't always necessary. Today I was at Keukenhof, where wielding the Sb-R1 around would have been impractical, so instead I worked with the SB-800, but took it off camera and used the SC-17 connecting cable so that I could control where the light was falling on the subject. Works just as well, and with Nikon's advanced TTL flash, exposures were spot on.
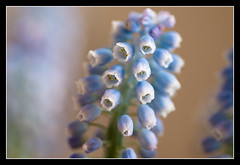
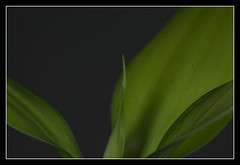
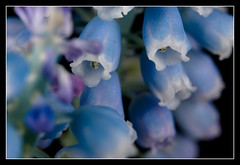
The second shot was taken with ambient light. This required a longer exposure to balance the exposure, and I ended up shooting at 1/3s. This gave the nice effect that the background (a white wall) was also exposed well, and I felt this gave the photo a dreamy quality. Of course outside this shot wouldn't have been possible, as even the slightest breeze would have left the picture unsharp, but there is nothing wrong with shooting specimens in a controlled environment inside (assuming of course you haven't taken the flowers from the wild with the sole intention of photographing them ;)
Another choice to be made with macro photography is the aperture to be used. This will have a dramatic effect on how much of the picture will end up being in focus, since the depth of field in macro photography is greatly reduced. Take for example the two shots accompagnying this blog - the first was shot at f/16, leaving a fair amount of the bloom in focus, whereas the second one was shot at f/5.6, leaving very few of the blooms sharp. In my experience, the more 'artistic' shots will use a lower aperture, whereas the 'documentary' shots will be shot at higher apertures.
In the age of digital SLR photography, shooting higher apertures brings its own challenges in the form of dust bunnies. It is an unfortunate fact that sensors do collect dust over time, due to their static charge, and regardless of how carefully lenses are changed, dust will end up on the sensor. You can check for dust on your sensor by shooting a white wall at f/16 or higher, and you will probably be suprised by the results. During 'normal' photography, you are less likely to notice the dust since (at least in my case) you don't use the higher apertures so often, but since macro photography means you are more likely to, this either means cleaning the sensor before a macro session, or using spot removal in Photoshop or Lightroom to try and remove the spots in post processing.
Needless to say, the use of a sturdy tripod and a cable release are imperative in order to get sharp results, but I'll leave that for another day.......
One of our friends gave us a muscari plant recently, and it also burst into bloom this weekend. Whilst it hasn't produced the deep blue blooms that are often associated with this particular flower, it nevertheless has given me a perfect subject to play around with my camera, and some of the results can be seen in my flickr photostream.
I am lucky to have managed to obtain a good secondhand copy of the Nikon 70-180mm F/4.5-5.6 Micro zoom before they either disappear from the face of the earth, or begin to command insane prices on ebay (Nikon recently discontinued this, their only Micro zoom, leaving only fixed focal length macros in their collection) and the flexibility of the zoom makes this an ideal lens for flower photography, and allows the photographer to get in much closer than just a bloom or a petal.
There are a number of choices to make with macro photography. Firstly the light source - should it be artificial, or available light? When shooting in the great outdoors, the subject and it's surroundings often dictate this, since any subject movement close up is greatly amplified, and needs a high shutter speed in order to freeze it, which is not always possible, so flash gives a number of advantages.
When using flash for macro, a close up flash kit such as the Nikon SB-R1(C1) is ideal. The top shot accompanying this blog was taken with the SB-R1, and two SB-R200 light sources either side of the lens. Due to the size of the muscari blooms, I was also shooting with the PK-13 (27,5mm) extension tube, and the Nikon 6T close up lens, and I wanted to get the in focus blooms to stand out a bit from the background. Now one of the nice things with the SB-R1 kit is that light fall off is pretty quick, so you end up with a nice black background, but in this case it wasn't happening initially, as the ambient light was too high, so I stepped the shutter speed up to 1/250s to aid the separation. (this also works inversely - by using slow shutter sync you can also balance the ambient light to give the background detail as well)
However, such a close up flash kit isn't always necessary. Today I was at Keukenhof, where wielding the Sb-R1 around would have been impractical, so instead I worked with the SB-800, but took it off camera and used the SC-17 connecting cable so that I could control where the light was falling on the subject. Works just as well, and with Nikon's advanced TTL flash, exposures were spot on.
The second shot was taken with ambient light. This required a longer exposure to balance the exposure, and I ended up shooting at 1/3s. This gave the nice effect that the background (a white wall) was also exposed well, and I felt this gave the photo a dreamy quality. Of course outside this shot wouldn't have been possible, as even the slightest breeze would have left the picture unsharp, but there is nothing wrong with shooting specimens in a controlled environment inside (assuming of course you haven't taken the flowers from the wild with the sole intention of photographing them ;)
Another choice to be made with macro photography is the aperture to be used. This will have a dramatic effect on how much of the picture will end up being in focus, since the depth of field in macro photography is greatly reduced. Take for example the two shots accompagnying this blog - the first was shot at f/16, leaving a fair amount of the bloom in focus, whereas the second one was shot at f/5.6, leaving very few of the blooms sharp. In my experience, the more 'artistic' shots will use a lower aperture, whereas the 'documentary' shots will be shot at higher apertures.
In the age of digital SLR photography, shooting higher apertures brings its own challenges in the form of dust bunnies. It is an unfortunate fact that sensors do collect dust over time, due to their static charge, and regardless of how carefully lenses are changed, dust will end up on the sensor. You can check for dust on your sensor by shooting a white wall at f/16 or higher, and you will probably be suprised by the results. During 'normal' photography, you are less likely to notice the dust since (at least in my case) you don't use the higher apertures so often, but since macro photography means you are more likely to, this either means cleaning the sensor before a macro session, or using spot removal in Photoshop or Lightroom to try and remove the spots in post processing.
Needless to say, the use of a sturdy tripod and a cable release are imperative in order to get sharp results, but I'll leave that for another day.......


Sunday, 4 March 2007
Going Retro
Started this week off on a training course in the UK, and whilst using the frequent breaks to do a bit of browsing, realised that the price of medium format camera systems has dropped significantly since the last time I took a look. Of course this is primarily driven by the introduction of digital, not only in the consumer and pro segment, but also in the medium format/studio segment of the market. Although the cost of going digital in combination with brands such as Hasselblad or Mamiya is still way beyond the means of most photographers, it has made for a steady flow of bargain priced analog medium format kits making their way to eBay.
So I bought one.
The package arrived this Saturday, and I was amazed at what I had obtained with my meager outlay of less than 500 Euros. This got me a Mamiya 645 Pro body, an 80mm F/2.8 lens, and a 150mm F/3.5 lens, together with a waist level finder and a prism finder.
The kit can still be bought in the shops today, albeit an updated model, and would cost 6 or 7 times what I paid for it. And in it's heyday would have cost double that again.
From first inspections it seems an incredibly well made system, totally interchangeable, and pro build quality. But compared to my Nikon Digital SLR system, it requires a completely different way of thinking.
It's manual. Manual focus, manual film drive, manual exposure. And it doesn't even have an exposure meter.
It's big. Although fairly ergonomic (it fits into my left palm, and I can use the left index finger to focus the lens, which occurs oh so smoothly, and use the right hand for the shutter release and film advancement crank), it won't be winning any prizes for portability.
It's cumbersome. For example, loading a 120 film (remember that stuff?!) requires taking out the insert, manually winding a film onto the spool, putting it all back together, and then advancing to frame one by turning the crank 4 or 5 times. Then the opposite to unload the film again at the end.
Compare this to the fast focusing, fast shooting, and high picture taking rate of the digital world, and you have yourself a completely different kettle of fish. But although I have no intention of replacing any of my digital gear with this beast, I hope that it will find a place in my photography. I see the larger frame size as being an ideal camera for portraiture, studio, and landscape, and the deliberate slow down in taking pictures, and higher cost per shot, will hopefully teach me to think a lot more before I shoot.
I've shot a few test rolls, and it is a joy to use. Keep an eye out here and at Flickr for some of my first shots......
Now there are certain situations where I see no place for the Mamiya.....
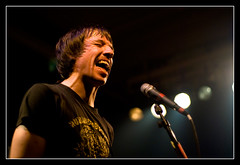
The shot accompanying this blog entry was taken at a concert I visited last week by Bromheads Jacket, who were playing at Paradiso, Amsterdam. It was the second time I had seen them at this venue, the previous time being at London Calling, late last year, and this time they played in the 'small room', which benefits from, in my opinion, much better lighting than the main hall.
Bromheads are known to incite their crowds into fairly lively behaviour, and this concert was no exception. It was a pretty tough job keeping the camera steady whilst being pushed from side to side by the people in the mosh pit, but I was pleased with the results I achieved, which can be seen in the following section of my Flickr photostream.
At one point the lead singer, Tim, decided to go crowd surfing, and I was able to pop up the built in flash on the D200 (I normally never use flash at concerts, instead relying on available light) and chase him round with the rest of the fans, ending up with a shot that conveyed the mood quite well. Of course I would never have risked my camera in this situation when I only had the one, but now I have my second d200, plus a decent insurance policy, it doesn't take a second thought ;)
Imagine doing that with a medium format system.......
So I bought one.
The package arrived this Saturday, and I was amazed at what I had obtained with my meager outlay of less than 500 Euros. This got me a Mamiya 645 Pro body, an 80mm F/2.8 lens, and a 150mm F/3.5 lens, together with a waist level finder and a prism finder.
The kit can still be bought in the shops today, albeit an updated model, and would cost 6 or 7 times what I paid for it. And in it's heyday would have cost double that again.
From first inspections it seems an incredibly well made system, totally interchangeable, and pro build quality. But compared to my Nikon Digital SLR system, it requires a completely different way of thinking.
It's manual. Manual focus, manual film drive, manual exposure. And it doesn't even have an exposure meter.
It's big. Although fairly ergonomic (it fits into my left palm, and I can use the left index finger to focus the lens, which occurs oh so smoothly, and use the right hand for the shutter release and film advancement crank), it won't be winning any prizes for portability.
It's cumbersome. For example, loading a 120 film (remember that stuff?!) requires taking out the insert, manually winding a film onto the spool, putting it all back together, and then advancing to frame one by turning the crank 4 or 5 times. Then the opposite to unload the film again at the end.
Compare this to the fast focusing, fast shooting, and high picture taking rate of the digital world, and you have yourself a completely different kettle of fish. But although I have no intention of replacing any of my digital gear with this beast, I hope that it will find a place in my photography. I see the larger frame size as being an ideal camera for portraiture, studio, and landscape, and the deliberate slow down in taking pictures, and higher cost per shot, will hopefully teach me to think a lot more before I shoot.
I've shot a few test rolls, and it is a joy to use. Keep an eye out here and at Flickr for some of my first shots......
Now there are certain situations where I see no place for the Mamiya.....
The shot accompanying this blog entry was taken at a concert I visited last week by Bromheads Jacket, who were playing at Paradiso, Amsterdam. It was the second time I had seen them at this venue, the previous time being at London Calling, late last year, and this time they played in the 'small room', which benefits from, in my opinion, much better lighting than the main hall.
Bromheads are known to incite their crowds into fairly lively behaviour, and this concert was no exception. It was a pretty tough job keeping the camera steady whilst being pushed from side to side by the people in the mosh pit, but I was pleased with the results I achieved, which can be seen in the following section of my Flickr photostream.
At one point the lead singer, Tim, decided to go crowd surfing, and I was able to pop up the built in flash on the D200 (I normally never use flash at concerts, instead relying on available light) and chase him round with the rest of the fans, ending up with a shot that conveyed the mood quite well. Of course I would never have risked my camera in this situation when I only had the one, but now I have my second d200, plus a decent insurance policy, it doesn't take a second thought ;)
Imagine doing that with a medium format system.......
Wednesday, 28 February 2007
Software Review: Adobe Lightroom

Up until now my post processing workflow has been relatively disorganised - I shoot everything in RAW to give me the most flexibility when back behind the computer, but how I process the NEFs has really depended on my mood. Typically I would use Adobe Bridge as my 'organiser', then tag the photos with red if I decide after looking at the preview that I would like to do some more work on the image. Once I have done a quick review of the images, I would open up each red tagged shot individually and use Adobe ACR to make fine adjustments to the exposure, and then open the shot in Photoshop to do the real hard work, using layers to play with hue, saturation, levels, curves, and sharpening until I have the end result I am happy with.
However, for 95% of the images, Photoshop has really been a bit of overkill, since I am only using the basic functionalities, and basically just an expensive memory hog.....
Enter Adobe Lightroom......
Lightroom has been designed from the ground up by Adobe as a photographer's workflow replacement, and has been labelled by many as being Adobe's response to Apple's Aperture tool, which has a very similar set of functionalities.
I downloaded an early beta copy of LR when it was first released and only available for the Mac, and quickly dismissed it - it didn't seem logical, and forced me to import all my photos to a separate library before I could work on them (which effectively doubled the storage space I needed for image storage). After playing with it for 30 minutes or so it found its way to my dustbin.
However, on Patrick's recommendation I took another look at the final release version, and was pleasantly suprised. In between the previous release I had tried, and this release, Adobe had acquired Pixmantec, the makers of RawShooter, a very flexible RAW workflow tool for the PC, and have integrated many of the features into Lightroom, making it a very flexible tool.
There are five main parts to the product: Library, Develop, Slideshow, Print, and Web. The idea behind this is first of all the user 'imports' his newly uploaded files into LR's Library (in this release however this is virtual - the images remain in their intial location, and information about the images is loaded into LR's database), then the user organises them, tags them, labels them, etc, and moves onto the next stage, Develop.
There are a number of ways an image can be developed - firstly, using the 'Quick Develop', LR will assign what it feels are the best automatic exposure settings to the image, and although this is still using Adobe Camera RAW, I have to say these settings are much more accurate than what I have experienced previously with ACR. You can either leave it at that (which I doubt I would do much), or you can fine tune the development stages, by altering contrast, saturation, hue, exposure, curves, and a number of other settings. The curve alterations has changed from Photoshop, and instead of working directly on the curve, you adjust the settings by using a number of slide bars below the graphical curve, and although this takes a bit of getting used to, in my opinion it is a lot easier to work with it like this.
One welcome addition to the develop stage are a number of presets, including various toning options (cyanotype, sepia), b+w conversions, and something called 'direct positive'. From what I can work out, this adds around +1.15EV to the exposure, and plays around with the contrast to give a very striking image which works especially well for fashion type images. Of course one can take this preset effect and adjust it to one's own preference. See the attached photo of Heleen for an example of how this can work
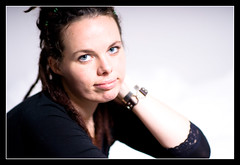
Within the Develop stage you also have the ability to do split toning, which basically gives the possibility of making toned images to your own preferences, and not just relying on the preconfigured Sepia and Cyanotype examples. Again some examples of these split tones can be seen in my Flickr photostream. Develop also supports the export of your images, and these can be automatically converted to jpg (or another format) images, assigned a colour profile, and then opened up in Photoshop or saved to disk. It is also possible to associate the export action with a Photoshop droplet, which could then, for example, add a custom frame around the edge of each image (the ability to add borders is something I feel is sadly missing from the product).
Once the developing has taken place, the next step is to display the images, and LR supports this with the Slideshow function, which allows you to show selected images as an onscreen slideshow. I really like this function, as you are not restricted to a single directory as the source for the slide show, but can instead set up a slide show based upon tags or labels, and add music (from directly within an iTunes playlist for example) and custom fade/slide progressions to the show. Ideal to show to a prospective client. The slideshow can also be exported as a pdf document, although of course the music does not get exported along with the pdf.
The Print stage allows you to set up an image for printing, and is something that I doubt I will do, since I still send away all my images to a pro lab for printing, but it seems a fairly flexible way of sending the image to a local printer.
The final stage is Web, and here Adobe has expanded the web templates from within Photoshop to give around 20 html and flash based web site designs. These can be customised to show your name, exposure details, and the colour schemes etc can be adjusted to your own personal tastes. It is definitely a very easy way to publish the images to the web, and can even upload to an ftp site automatically.
Overall, for a v1.0 Adobe has done a very good job in creating a market ready product, and I feel they have learnt from some of the weaknesses that Apple Aperture has. It uses many of the good Photographer's features from Photoshop, and expands on them to make them more friendly to the image maker. I am still discovering much of the product, but can already see that it will have a place in my workflow from now on. I will still use Photoshop from time to time, for example if I need to do cloning in an image, or play with some of the more advanced filters available, but for most of my standard stuff Lightroom will do the job.
It is available as a free 30 day trial from Adobe, and I would encourage you all to give it a go and let me know how you feel about it.....
Subscribe to:
Posts (Atom)